
Any developer can tell you – code formatting is a highly charged topic where opinions run rampant.
What they can also tell you is that about 70% of a developer’s time – more or less – is spent working on someone else’s code. And reading someone else’s code can be a real challenge, depending on what kind of formatting they use. Or worse, don’t use.
Formating Code in Anypoint Studio
Anypoint Studio to the rescue. It’s possible to set Anypoint Studio to automatically format code to make it easier to read. It’s one quick option to help format the code in a more readable layout.
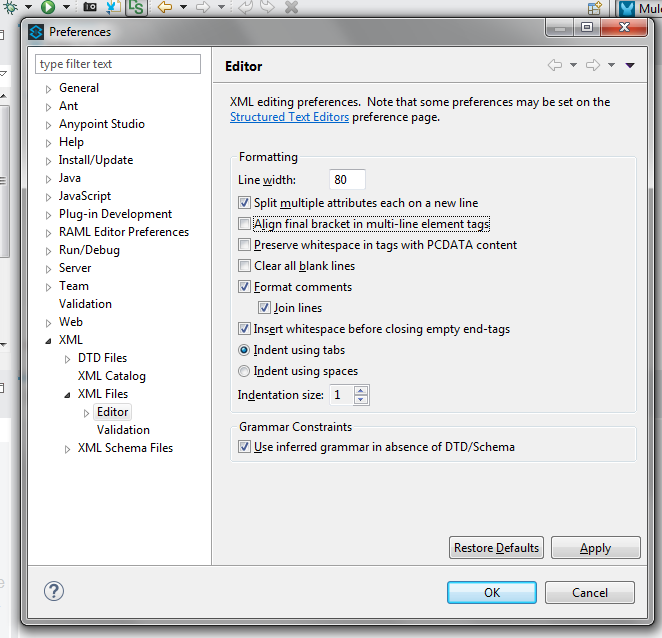
Once you have Anypoint Studio open with a project, go to the Windows menu, and select Preferences. This opens the Preferences window.
From there, navigate to the XML section, then XML Files, and lastly Editor.
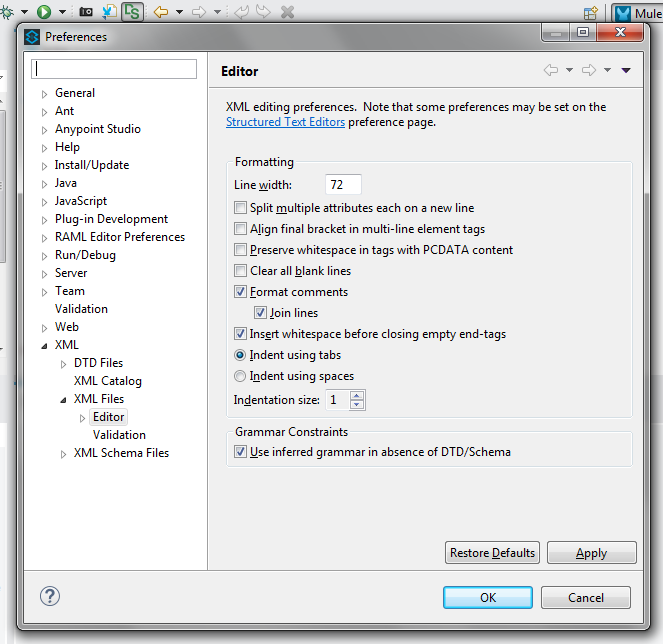
You’ll want to select the top box – “Select multiple attributes each on a new line”. Also, if you have a wide monitor, consider changing the Line Width from the default of 72 to 80.
Click ok.
Once you have your preferences set, go back and take a look at your XML code (not the visual editor).
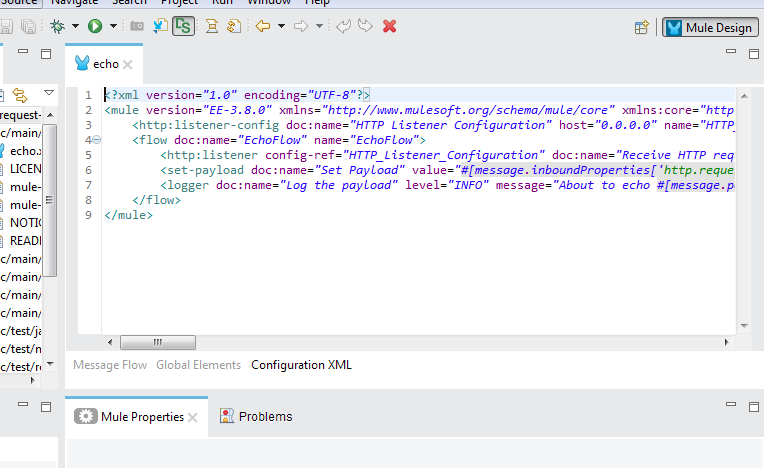
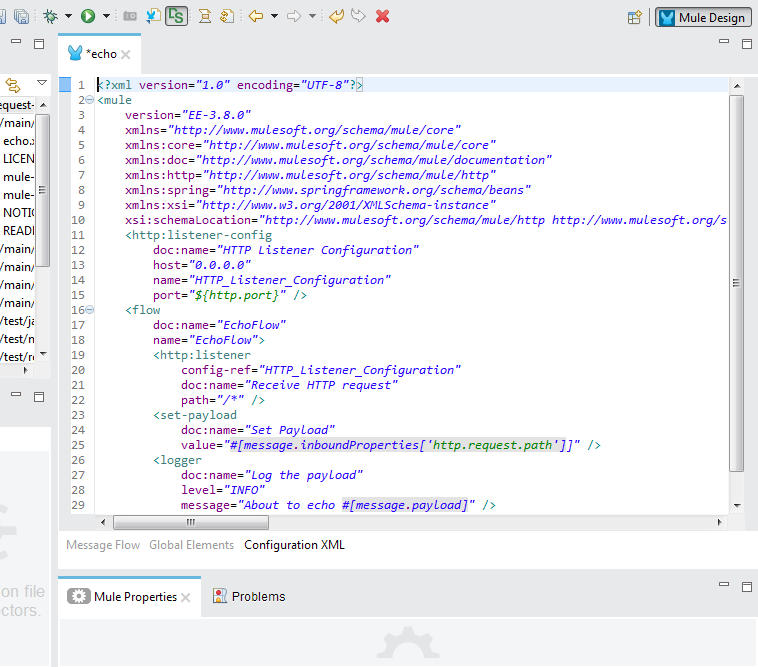
While viewing the code, hit Ctrl-Shift-F (or Cmd-Shift-F on Mac). The code is then formatted based on the preferences you just set.
Sure, setting the formatting in Anypoint Studio might seem like a pretty simple tip, but if you ever need it, you’ll be glad you know about it. And while it may not be your formatting of choice, it’s a quick way to reset code you’re looking at when pair-programming, doing code reviews, taking on a new project, or even looking at the MuleSoft example code included with Anypoint Studio.


This still works in Anypoint Studio 4.x, very handy!